
How to touch up worn wood stain without refinishing
Fix a worn corner or pale scratch without stripping the whole piece. Spot the damage type, test your color, then apply thin coats with the grain to blend it in.
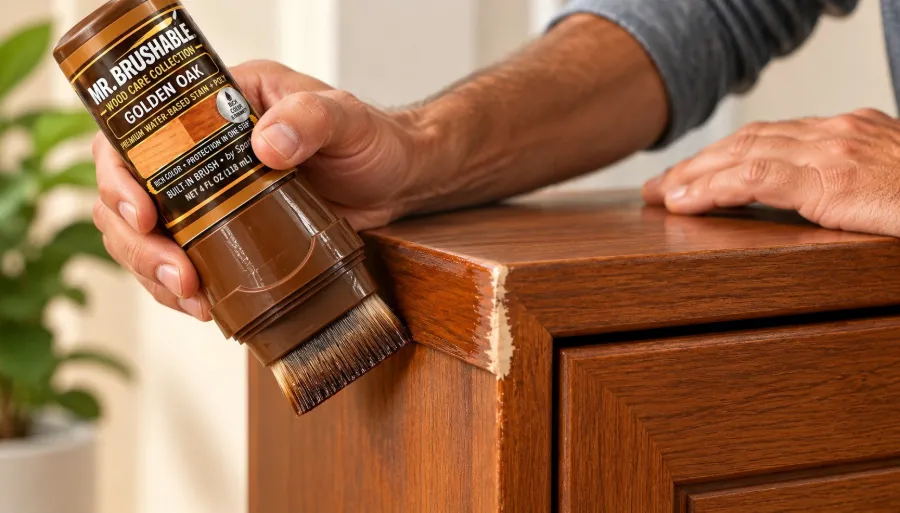
A pale scratch on a dresser or a worn corner on a cabinet door doesn't mean you have to strip and refinish the whole thing. If the finish around the spot is still in good shape, you can usually fix just the damaged area. The trick is to figure out what kind of damage you're looking at first, test your color somewhere hidden, and add only as much stain as the spot needs.
In this guide
- Step 1: Figure out what kind of damage it is
- Step 2: Test your color where no one will see
- Step 3: Clean the spot gently
- Step 4: Apply thin, with the grain
- Step 5: Check the shine, not just the color
- Step 6: Keep it from wearing again
- FAQ
Step 1: Figure out what kind of damage it is
Look at the spot straight on, then from the side with light coming across it. Ask yourself one question: is color missing, is wood missing, or is it just the shine that's off?
- Pale line or light spot: the stain color has worn away. This is what a stain touch-up fixes.
- A dent or gouge you can feel: wood is missing. Color alone won't level it out – it needs a filler first.
- A dull or cloudy patch: only the clear top coat is damaged. Adding brown color here can make it look worse.
Start with one small spot, not every mark on the piece. If the wood is a thin veneer that's lifting at the edge, or it's a valuable antique, get it repaired properly before doing any color work.
Step 2: Test your color where no one will see
Don't trust the name on the label – two “walnut” stains can look completely different. Try your stain on the back of a drawer, underneath a shelf or on a scrap of the same kind of wood, and let it dry. Then hold it right next to the damaged spot in the same light.
Is it too light, too dark, too red or too gray? Write it down. That tells you much more than “the wrong brown.”
Mr. Brushable Wood Stain + Poly
Step 3: Clean the spot gently
Don't sand just because there's a mark. Sanding a small scratch can turn it into a big bare patch. Only do the prep the damage actually needs.
Safety note:
Step 4: Apply thin, with the grain
- Do your hidden test first and let it dry.
- Use a little. Put on just enough for the mark, not the whole panel.
- Brush with the grain and stay inside the pale area.
- Wipe extra off if the directions say to. Stain-and-poly products like ours are brushed on and left to dry.
- Let it dry, then look again. Add another light coat only if it's still too light.
Fix one spot all the way first. If it blends, do the rest the same way so they all match.
Step 5: Check the shine, not just the color
Color and shine are two different things. Once it's dry, look at the spot from the front and from the side. If the color matches but the spot looks shinier or duller, stop adding stain – more color won't fix shine. If you went too dark, don't spread stain onto the wood around it to hide it. Go back to your test spot and adjust.
Step 6: Keep it from wearing again
Ready to fix that worn spot? Shop Mr. Brushable Wood Stain + Poly →
Frequently asked questions
Can I use stain to fix a white water ring?
Usually not. A white ring is damage in the clear top coat, not missing color. Adding brown stain on top won't fix it and can make it look worse.
Does rubbing a walnut on a scratch really work?
It can hide a light scratch for a while, but it's just a cover-up. It doesn't replace lost stain or protect the wood the way stain plus a clear coat does.
Will a second coat make it darker?
Yes. Every coat adds color, so test on a hidden spot first and add coats one at a time, letting each one dry.
Do I need to sand first?
Not for most small worn spots. Sanding can make the damaged area bigger. Clean it, test your color and apply thin coats instead.
Squeeze. Brush. Done.
Touch-up paint with the brush built into the bottle, from $8.99. Free U.S. shipping on orders $25+.